Welcome, Ana! Hope you enjoy the program!
And worry about the assignments being interesting or not. Just keep posting here so we can all exchange feedback and improve 
Good work so far! Keep it up 😁👍


Welcome, Ana! Hope you enjoy the program!
And worry about the assignments being interesting or not. Just keep posting here so we can all exchange feedback and improve
Good work so far! Keep it up 😁👍
Thank you very much! ^___^ I'll do my best!
Hello and welcome to Artschool! It's nice that you decided to go for what you love and I look forward to see your progress
Thank you for the support! ^^ I am currently in the Drawing nudes chapter (1st Term). Probably will continue posting my practice next week.
Also, I just downloaded the Art course Schedules to see if they suit my timetable. I have no job this year and I manage to dedicate around 4h daily to the course, so I was planning to make one chapter every 2 weeks (that would be 1 complete Term per month, the complete course would be finished in one year)... Is it too ambitious or unrealistic? Could you tell me how much time do you dedicate to each Term?
Volume study! I struggled a lot with the first ones, but I felt much more comfortable with the last ones. Even the lines I made with the tablet are more firm and strong, so I am quite happy 
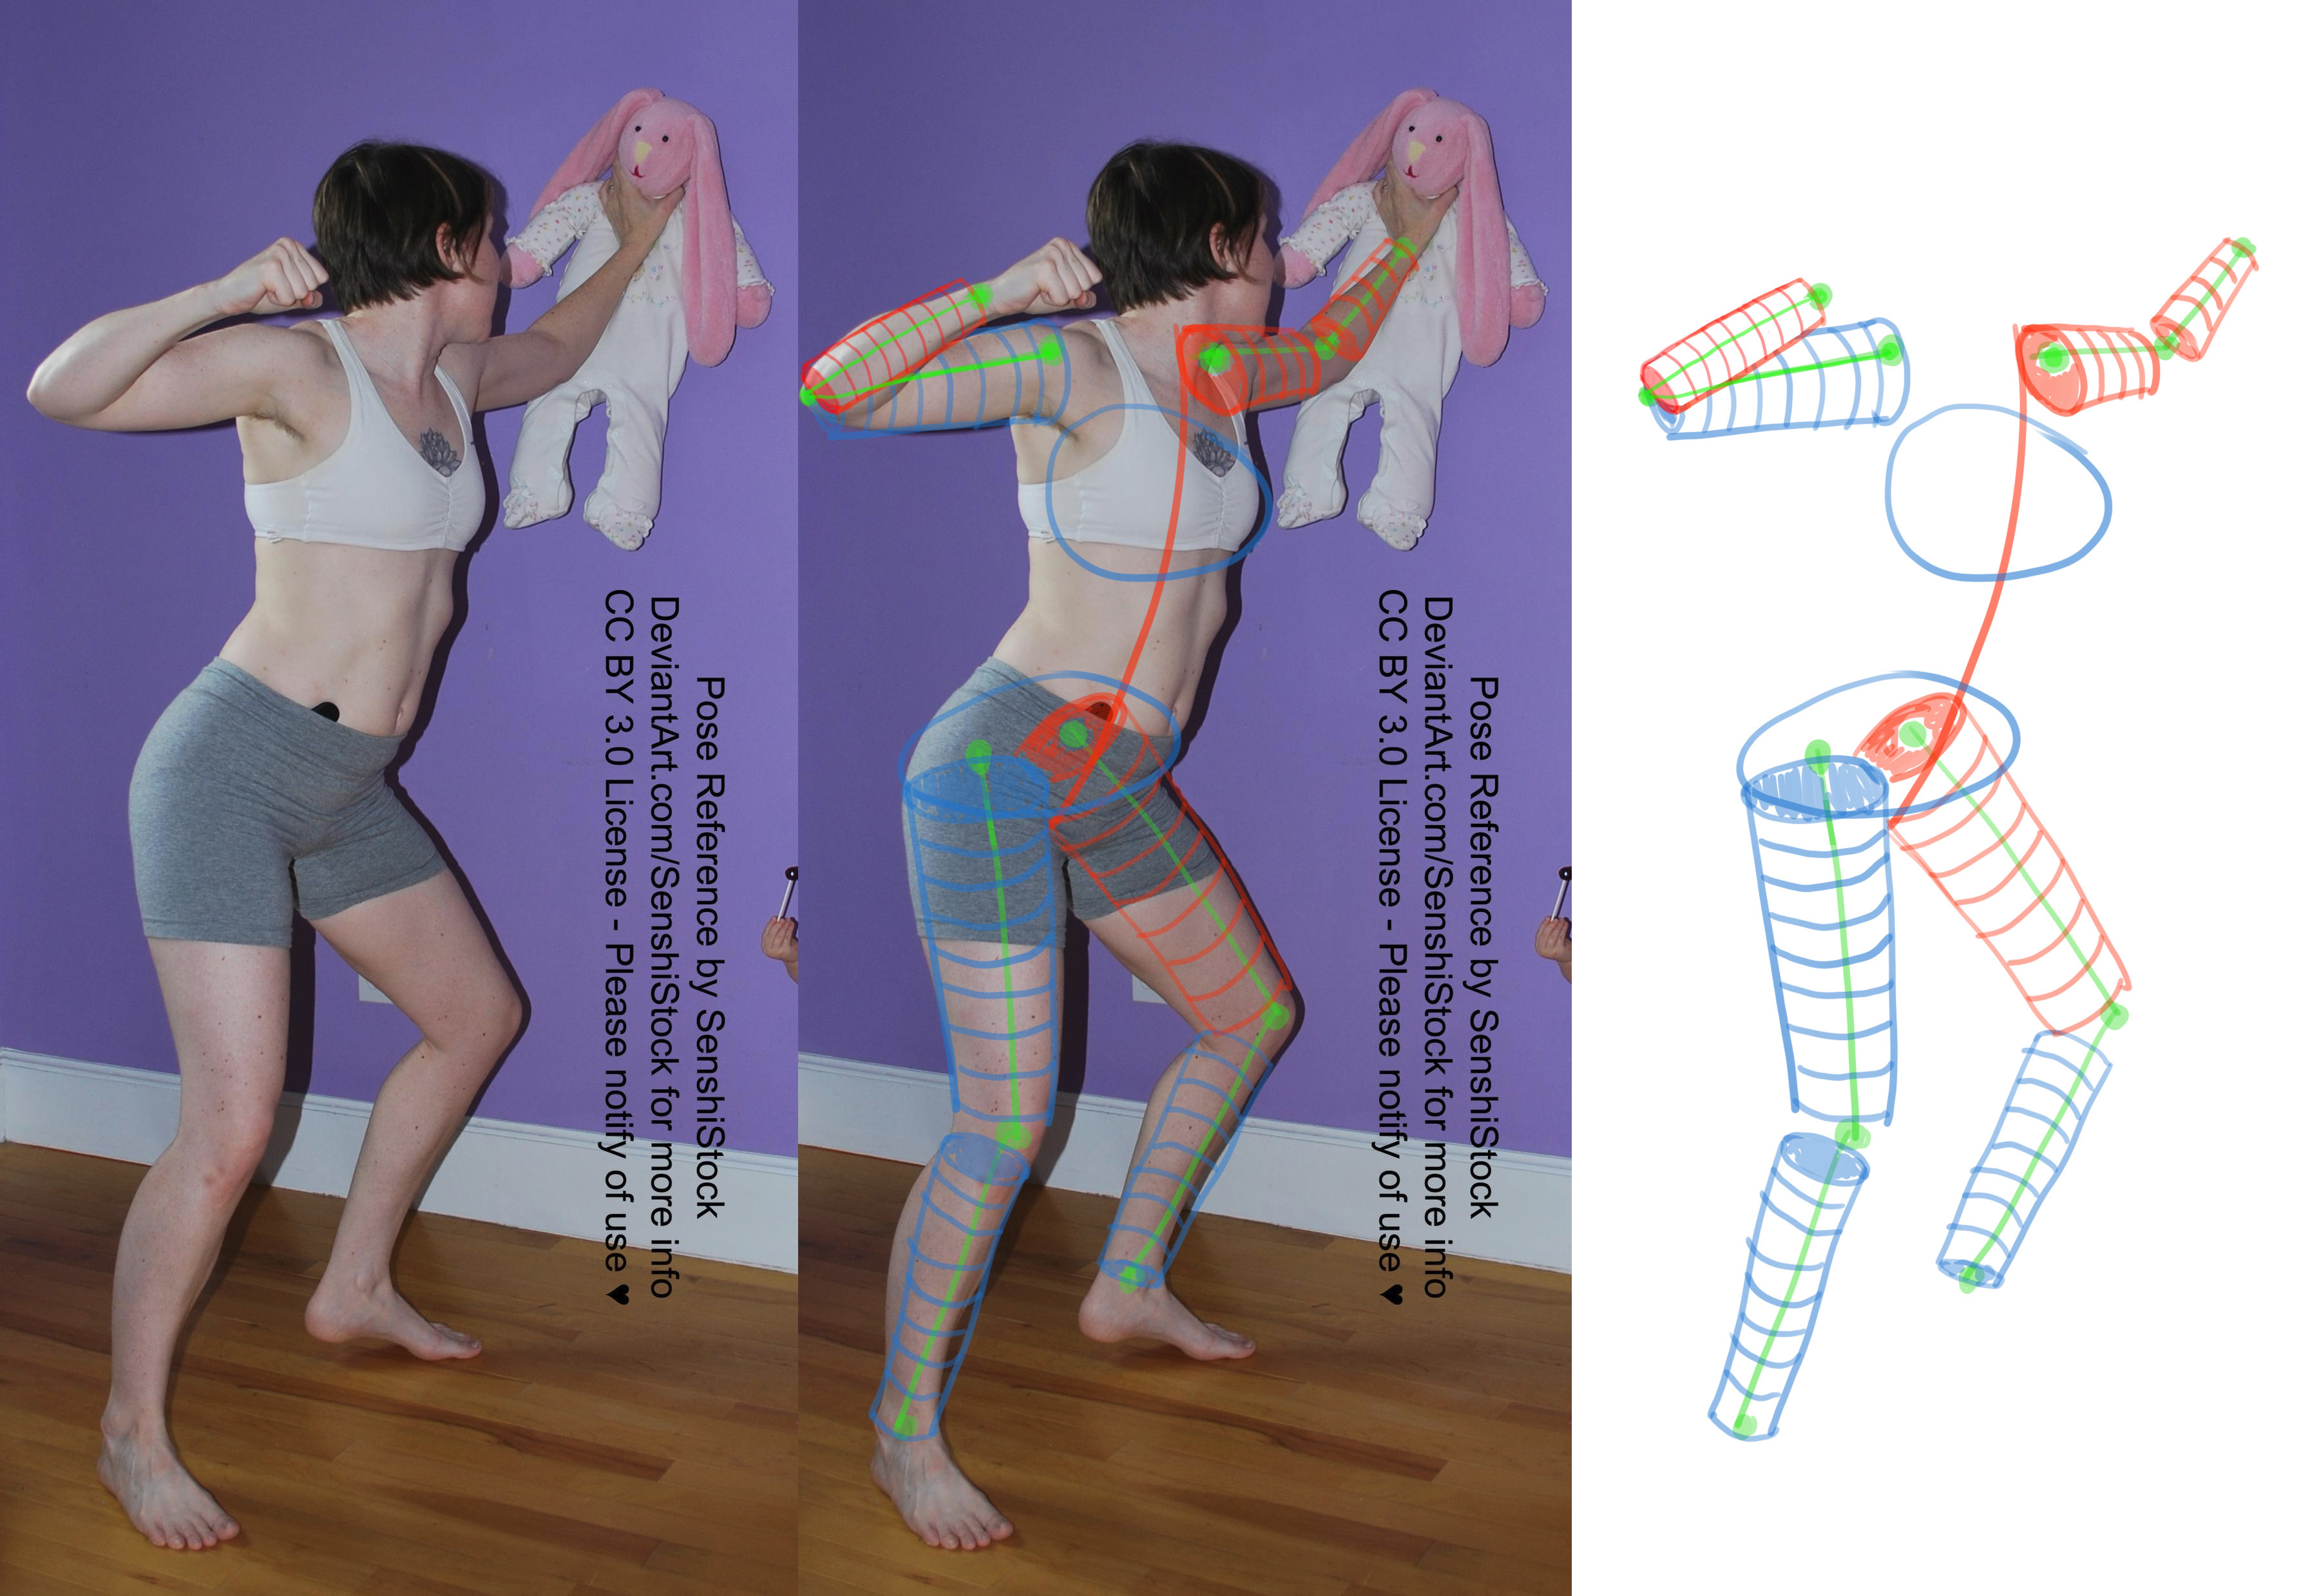
I am still struggling with the hip joints, I am not very sure of where to put them, specially when the bodies are twisted and they are not visible... In addition, I am not sure about the action line in the 2nd pose, or where to put the ovals in the man pose... If anyone could help me with those, I would be grateful (=______=U)
Also, I realized too late that I should not draw the cylinders when they are overlapped (sorry about this, the lines can be quite confusing when I overlap two cylinders...I went again over the first ones and corrected almost all of them, but one or two still have that defect).


I am not very sure about this one either... Maybe the arms shouldn't be flat cylinders:


I think he said it in the video for this lesson to draw a square/rectangle around the hips and ribcage. Then the shoulder joints go somewhere around the top corners of the ribcage square and the hip joints go somewhere in the bottom 1/3 of the hip square. He even showed when he put ovals instead, he thought about the squares for placement of the joints.
You've definitely got a clear understand of the volumes - you can feel each pose even when the cylinders aren't overlapped.
As @l0rclz33 said, using squares or rectangles can help a lot with the placement of the joints. The square/cube shapes can help more - I personally find it easier to split them, circles are more difficult. The hips lie about 1/3 from the bottom of the ellipse just outside 
I think i should have them higher than drawn, but the sentiment is there  Its the same with cubes/squares/rectangles also.
I don't think it's unrealistic, but it depends on you, how disciplined you are and how quickly you will grasp and apply the things that are taught. As for how much time I spent on each, it's hard to say. I did it in a fluid way where I focused on the subjects that interested me the most or I felt would be the most beneficial, mostly anatomy. So I sort of went back and forth between the terms, if that makes sense.
Oooh, now that you mention it, I remember that he indeed drawed the hip points after drawing a cage! Thank you! (I am Spanish, so I sometimes miss some phrases in the videos... my fault). You're absolutely right, thank you! I will watch it again.
Thank you! I thought about making it the way you say (fluid), but I know so little about everything that I decided at last watching the chapters in order... even with Photoshop I learned a couple of new things, so it was worth it, yay! ^^
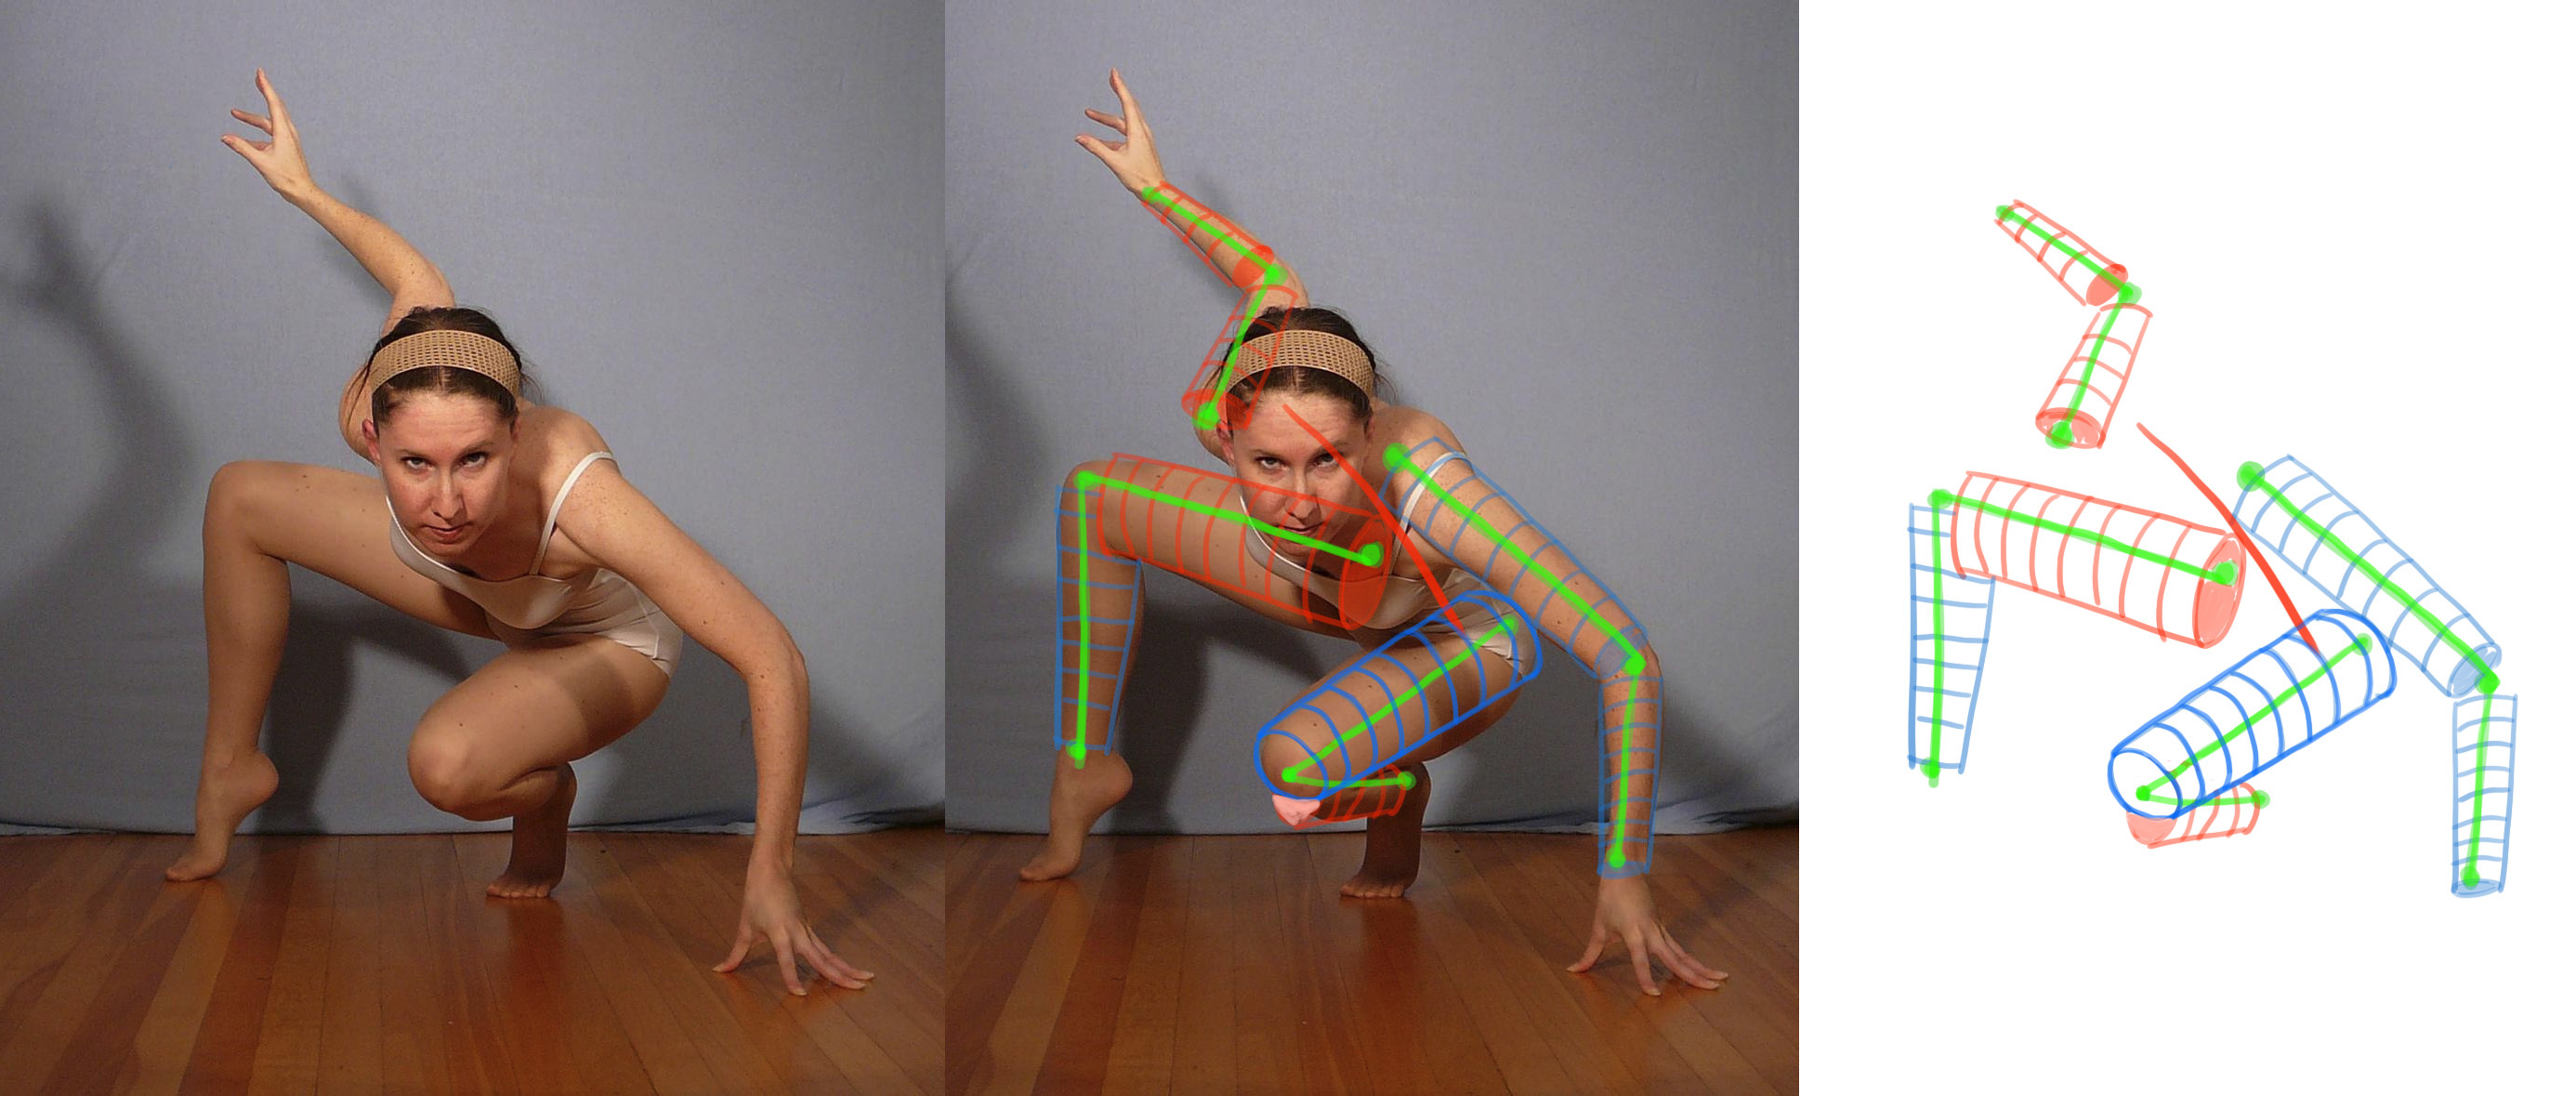
This week is being a little bit messy, but I managed to practice some gesture drawing... (I am aware of Marc telling us that the absolute acceptable maximum would be 2 min timing per drawing, but I used some YouTube videos, which changed pictures each certain time, and it is so funny that I keep drawing with their 5 an 10 min poses too...).
Not a lot to comment about them, but I wanted to leave my progress here anyway... I consider a "succesful" one if I can understand the pose only looking at the drawing and not at the model. At this point, I struggle A LOT with 30 seconds sketches, I feel better about the 1 minute ones, and quite confortable with 2 min sketches. I am also horrible at drawing hands (=______=) We'll see if all of that improves with practice!
15 days later
Hi everyone... I am not dead, It's just that I got stuck in the perspective drawing of the room (too much lines, since I added a lot od shelves) and I unexpectedly got a new job, so I have very little time to digi in it. I am still trying to finish it and show it to you. Until then, I did some other perspective exercises on pictures, and I have a couple of doubts if anyone can help U___U Thank you in advance.


8 months later
Hi everybody... I am alive. I suddently had to take a very hard job for 7 months, and I had to stop the course progress because I was too tired to watch the classes withour falling asleep each time u_______u but I am back, and I want to push it and to achieve my goal, no matter how much time it takes. I leave here my perspective room exercise... It's not perfect at all, I still have lots of understanding problems. I post it without finishing it, because I want to practise perspective and not to get stuck in the details of the room.
I had problems understanding the perspective of the books that I was trying to draw in the shelves, so I did some sketches aside to undersand their final form. I will finish this piece in a future, but for now, I think it's time to continue and try with more perspective points...

Great to have you back!
and good job on the perspective assignements! 
Thank you a lot! I hope to continue without stopping this time!